It’s not particularly original these days to put together a railway feature to mark the 100th anniversary of the Furka–Oberalp Railway. Given the hot weather, I wasn’t feeling very creative, so I set myself what I thought would be a simple topic: the Glacier Express on the Furka mountain route during its final years of electric operation.
Although there are plenty of photos, unfortunately the Glacier Express isn’t always recognisable as such, as the dining car was usually detached at Andermatt and re-coupled to the return train via the Oberalp, meaning it isn’t a reliable identifying feature.
Furthermore, due to the high volume of traffic over the Furka in its final years of operation (everyone wanted to enjoy the journey one last time!), the FO regularly hired carriages from the RhB for its own train services. Carriages from neighbouring railways are therefore not a reliable distinguishing feature either.
There were also frequent instances of multiple-unit formations. Due to a lack of availability, these were no longer necessarily fitted with modern rolling stock. Old platform cas were also used. However, these were also deployed on the official Glacier Express nostalgia trains…
And last but not least, I wanted to include the most representative photographic spots along the Furka mountain route in this railway history. However, many of these are unsuitable in terms of sunlight during the Glacier Express’s operating hours.
Conclusion: this history presents locomotive-hauled trains on the Furka.
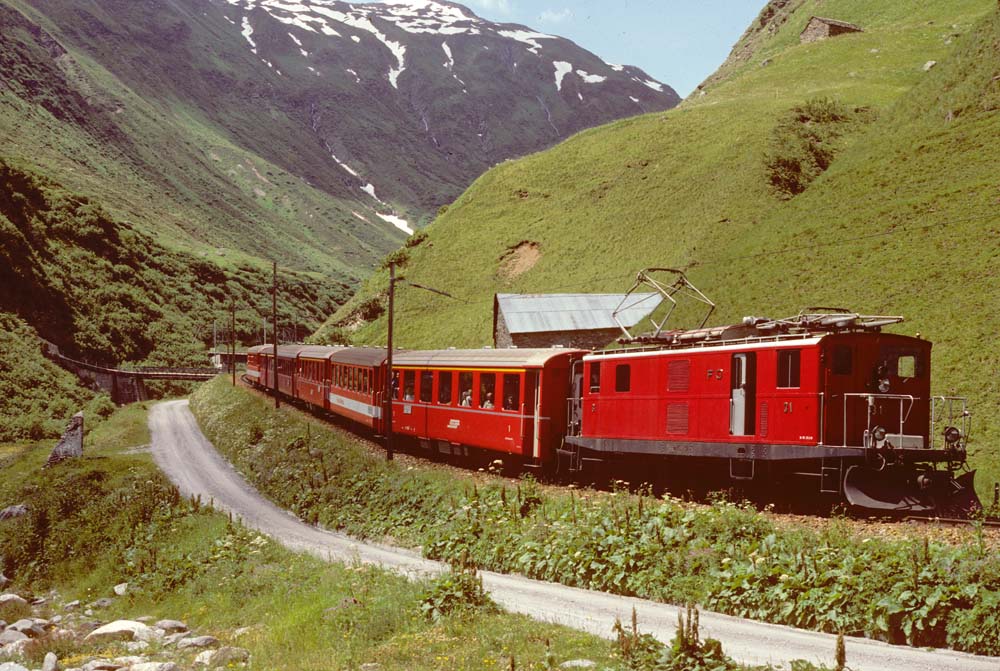 Shortly after leaving Realp station, the first train we encounter is the Glacier Express. On 5 July 1981, it was made up as follows: FO HGe 4/4 31 + RhB A 1253 + FO B 4267 + RhB A 1255 + BVZ B 2285 + FO B 4266 + FO B 4265. This colourful mix of carriages from all three railway companies involved in the Glacier Express – BVZ, FO and RhB – was typical of those years. Realp, 5 July 1981, Photo: © Edi Meier, Bülach
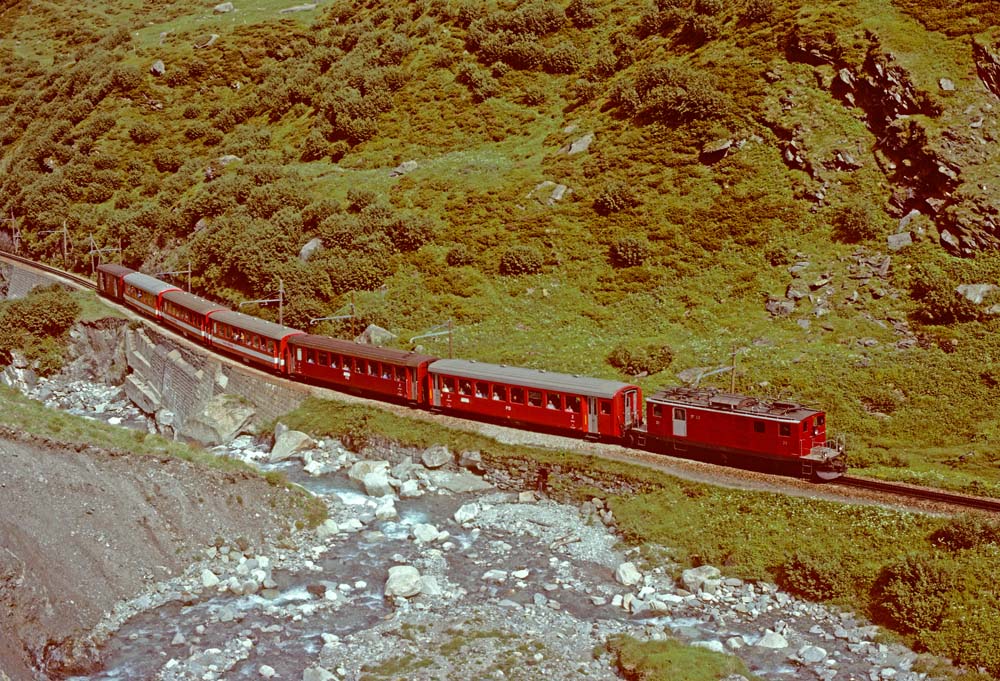 In a narrow valley, the track climbs steeply thanks to the rack-and-pinion system. The opposite slope is rather slippery, as can be clearly seen from the landslide at the bottom left. Although fallen rocks repeatedly block the track in this section, the valley side has nevertheless been chosen correctly! FO HGe 4/4 31 + FO B 4257 + FO B 42XX + FO B 4269 + FO B 4270 + FO A 4063 + FO DZ 4142 are travelling between Realp and Tiefenbach on 5 July 1981. The first two B cars still bear the old, single-colour livery in a slightly darker shade of red. The next two B cars and the A 4063 are already sporting the new livery with the white stripe. Between Realp and Tiefenbach, 5 July 1981, Photo: © Edi Meier, Bülach
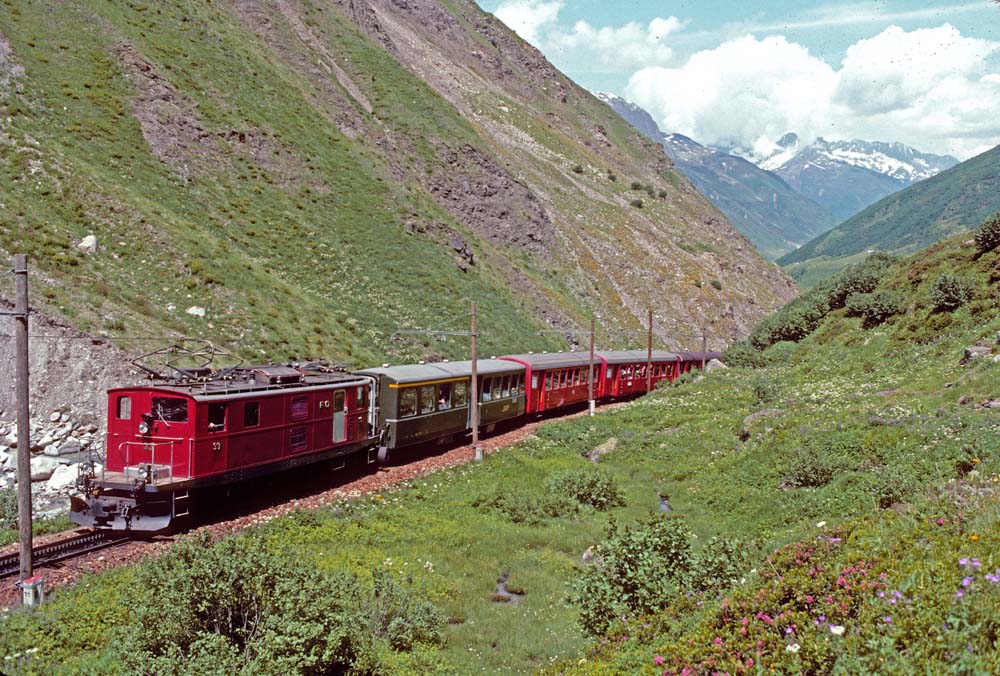 Just below Tiefenbach on 5 July 1981, the FO HGe 4/4 33 + RhB AB 1518 + FO B 4255 + FO B 4256 + FO AB 4161 + DZ 4342 climbs uphill. Clearly visible above the train is the steep, unstable opposite slope from which the last photo was taken – climbing it is not recommended! Below Tiefenbach, 5 July 1981, Photo: © Edi Meier, Bülach
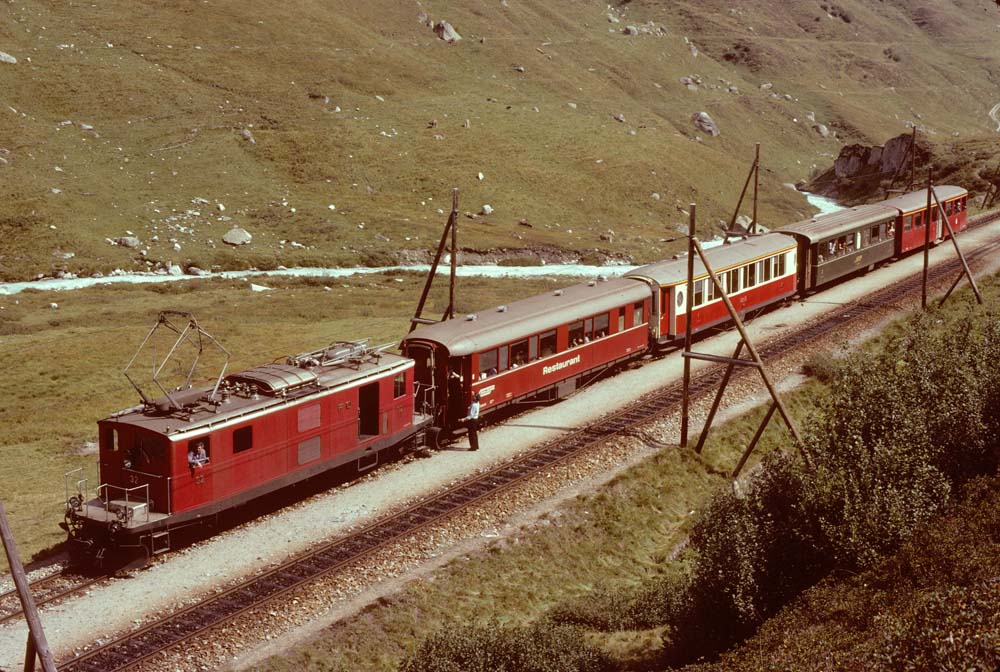 This interestingly configured train, comprising the FO HGe 4/4 32 + RhB WR 3814 + RhB saloon carriage As 1144 + RhB B 2211 + BVZ A 2067, has reached the Tiefenbach passing loop and is waiting for the oncoming train. The high proportion of first-class seats is striking. I can no longer say whether the dining and saloon carriages were provided by a particular company, or whether this was a double-headed Glacier Express service using rolling stock that had been cobbled together in some way. Tiefenbach, 8 September 1979, Photo: © Edi Meier, Bülach
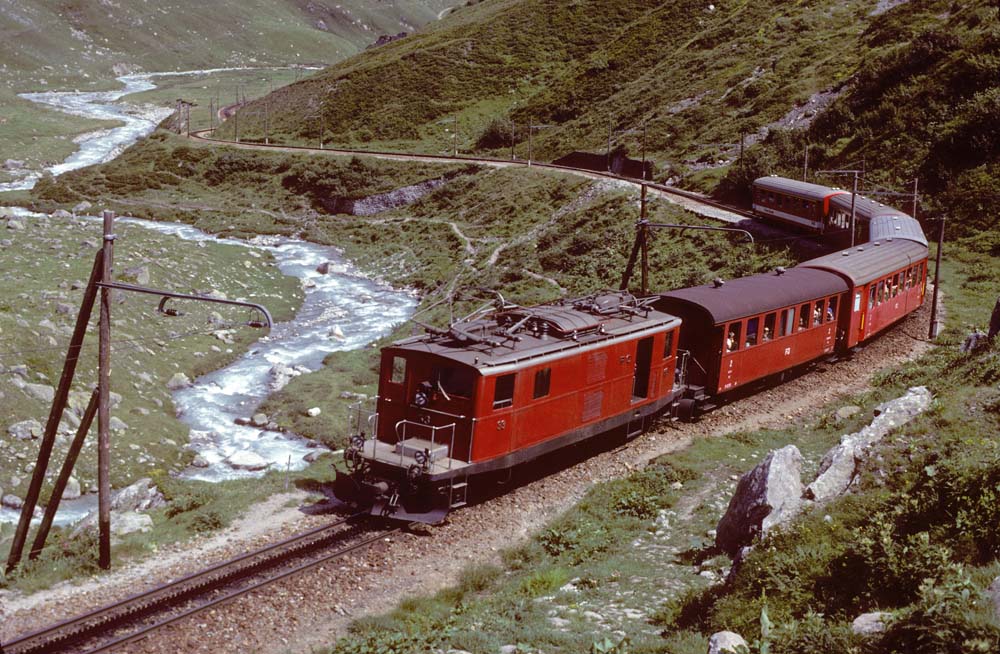 Above Tiefenbach, the route continues on a rack-and-pinion line. Tiefenbach lies beyond the lowest bend in the slightly wider section of the valley. FO HGe 4/4 33 is on its way with the leading platform car FO B 4226 + FO B 4354 + RhB B 2213 + FO B 4255 + FO A 4064. This is probably not the Glacier Express, but a long FO train with a carriage hired from the RhB. Probably Tiefenbach, 6 August 1981, Photo: © Edi Meier, Bülach
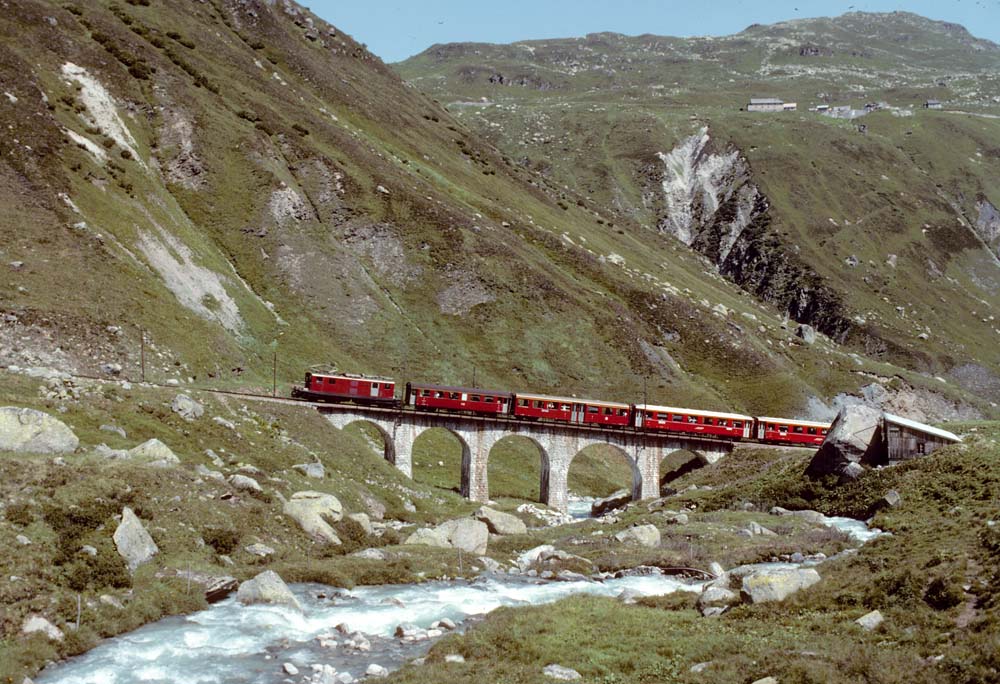 A little further up the mountain, the Furkareuss is crossed via a lovely stone bridge. In ‘Steinstaffel’, as the area is known, there were two simple shelters, and cows would sometimes be grazing there. When required, their milk was loaded onto the last train, which made a brief stop near the large rock on the right, next to a small wooden platform. Local customers were prioritised over strict adherence to the timetable, although this was regularly disrupted when multiple Glacier Express trains were running. FO HGe 4/4 31 + FO A 4062 + BVZ A 2062 + RhB A 1256 + FO B 4265 + BVZ B 2285 presumably form the Glacier Express, with a very high proportion of first-class seats. Above Tiefenbach, 6 August 1981, Photo: © Edi Meier, Bülach
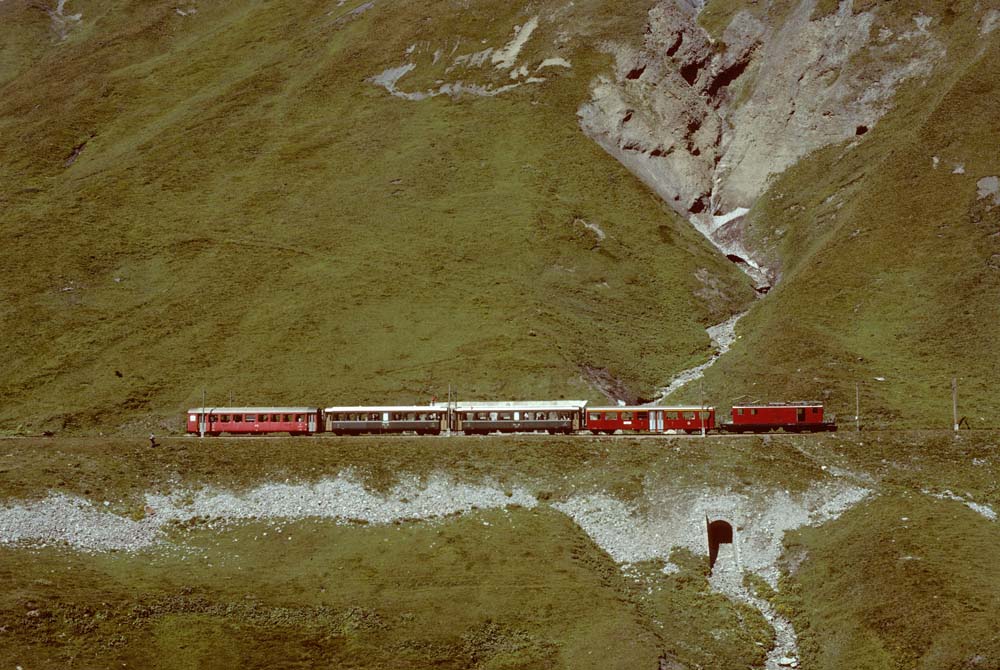 This cross-shot of the Furka station just before the Scheiteltunnel shows the FO HGe 4/4 36 with a BVZ A from the 2061–2067 series, two RhB Bs from the 2211–2216 series and an FO B from the 4251–4258 series. Even though the FO trains passed the photographer so slowly after the shot was taken that one could normally easily read and note the carriage numbers, here he was simply too far away… At least the locomotive number can be made out on the slide. Furka station, 22 August 1981, Photo: © Edi Meier, Bülach
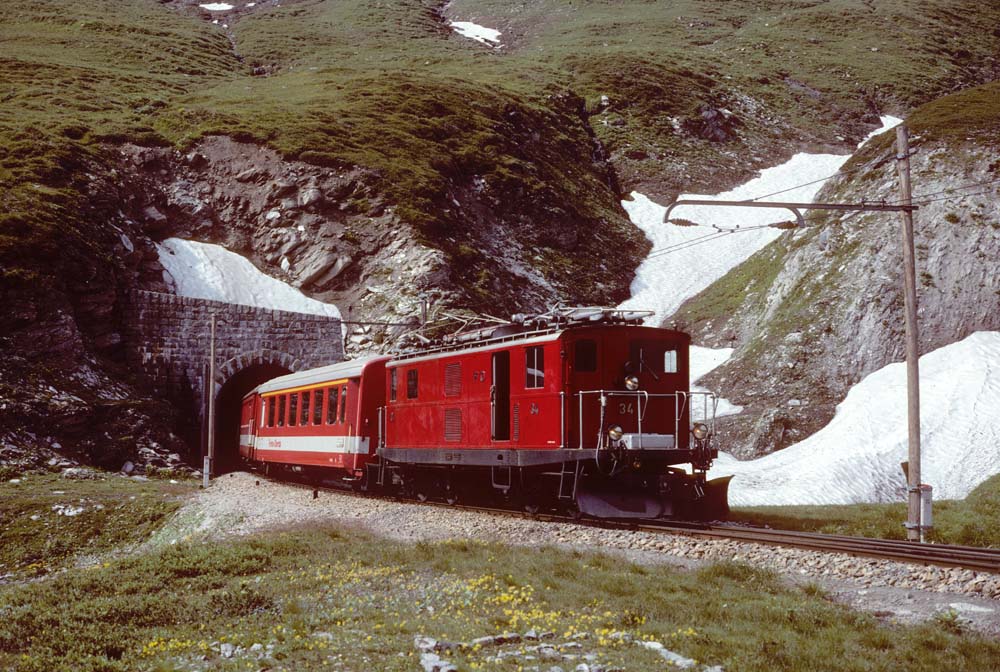 Immediately after the exit points at Furka station, the Scheiteltunnel begins; in this photograph, a train travelling in the opposite direction is emerging from it, comprising the FO HGe 4/4 34 + FO A 4063 + FO B 4270 + FO B 4269 + FO B 4271 + FO B 4263 + FO B 4225. The fact that the consist comprises only FO rolling stock suggests this is an FO train stopping at all stations. Incidentally, the summit tunnel is slowly being compressed by the pressure from the mountain (even today!) and, before seasonal operations could commence, it first had to undergo a profile measurement run, with rock being blasted away where necessary. Even though a reduced profile is sufficient for steam operations, this remains a major problem! Furka station, 2 August 1981, photo: © Edi Meier, Bülach
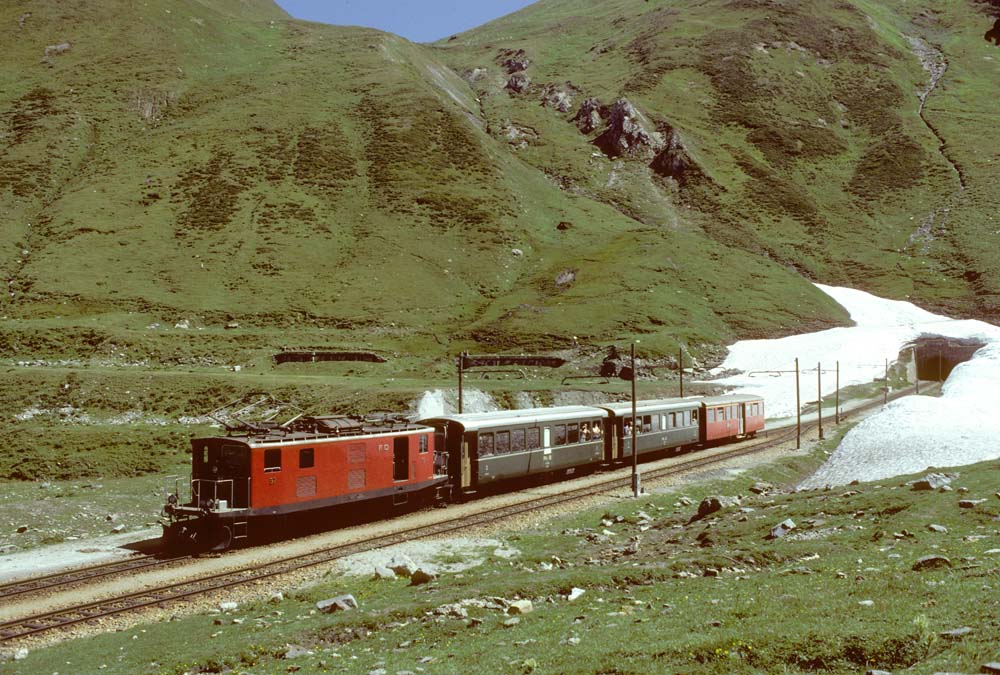 On the other side of the Scheiteltunnel lies Muttbach Belvedere station. FO HGe 4/4 37 + RhB B 2214 + RhB B 2215 + BVZ A 2065 have passed through the tunnel and are making the scheduled stop, or waiting for an oncoming train. The station is situated in a well-known avalanche corridor, and in spring metres of snow have to be cleared away. At the start of the year, trains in this passing loop were flanked by high walls of snow.
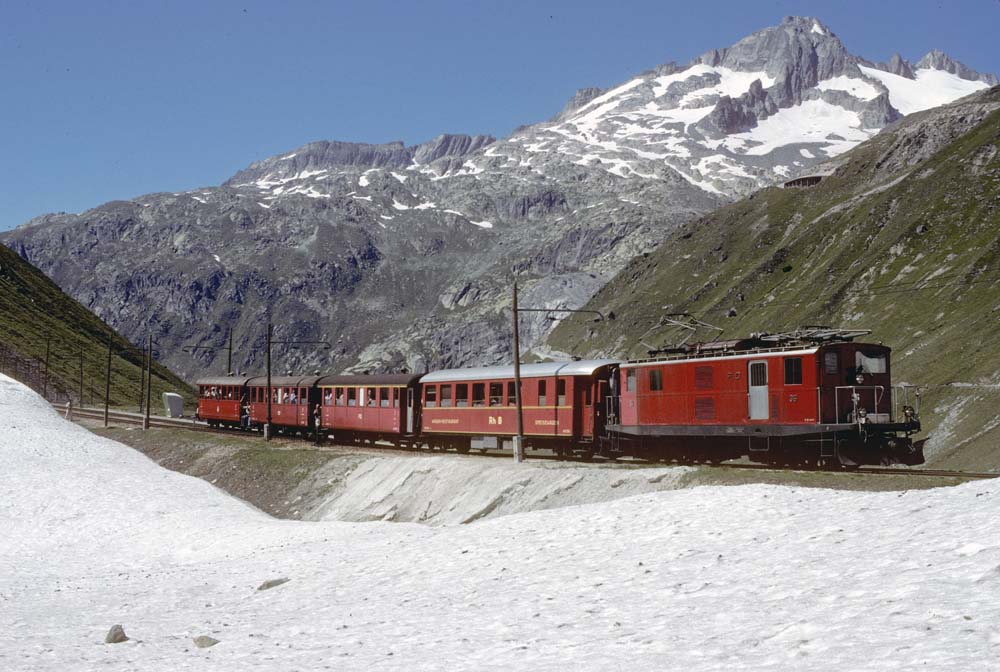 Muttbach Belvedere station, with a train arriving from Gletsch, offers a magnificent panorama dominated by the Gärstenhörner. The rocky outcrop in the cutting was still covered by the Rhône Glacier a good 100 years ago, which once extended as far as the Gletsch plain. The rocks have therefore been smoothed flat by glacial ice. A nostalgic Glacier Express reaches its final stop in Valais: FO HGe 4/4 36 + RhB WR 3811 + FO A 4062 + FO B 4228 + FO B 2225. Muttbach Belvedere, 18 August 1981, Photo: © Edi Meier, Bülach
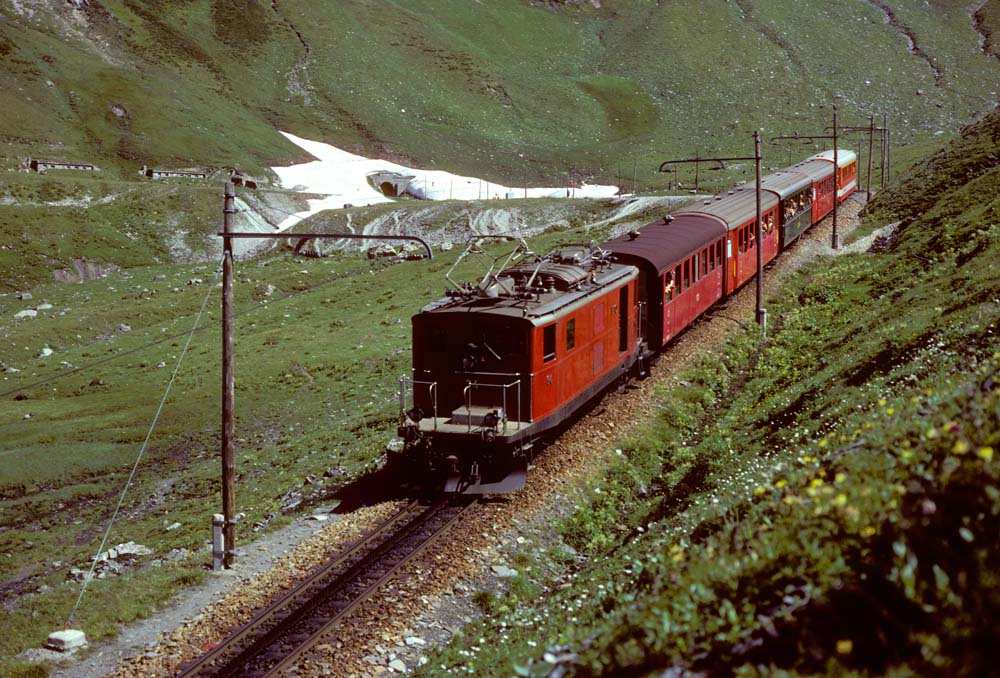 Immediately after Muttbach Belvedere station, the descent towards Gletsch begins with another rack-and-pinion section. FO HGe 4/4 34 + FO B 4224 + FO B 4254 + RhB B 2212 + FO B 4253 + FO A 4066 have just set off along this route. Behind the train, you can see the station and the tunnel entrance. Below Muttbach Belvedere, 15 August 1981, Photo: © Edi Meier, Bülach
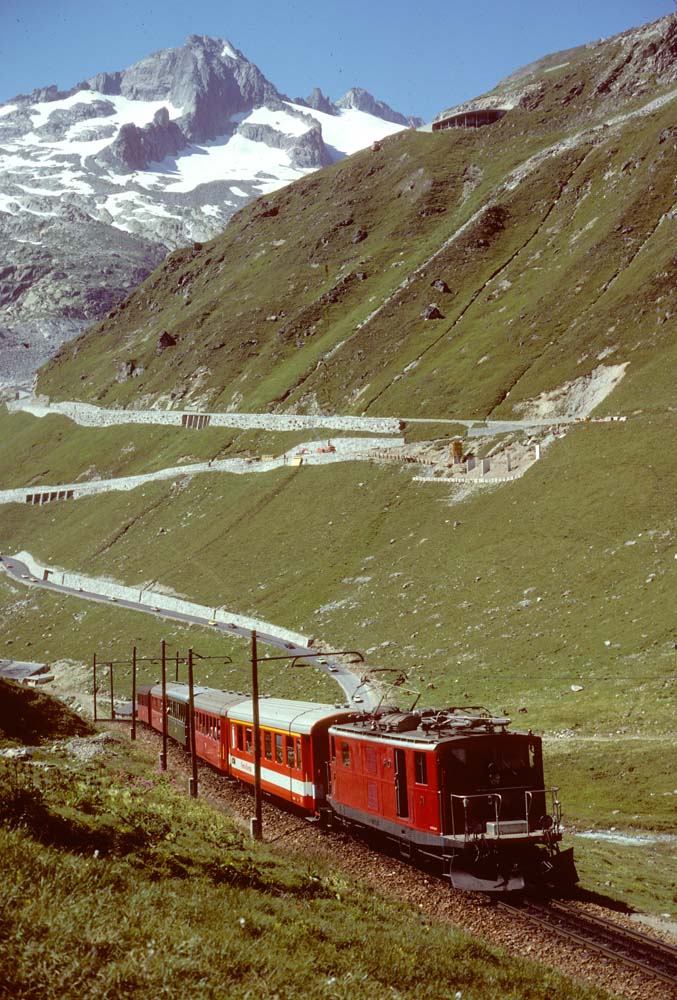 Looking in the opposite direction, the view opens out onto the hairpin bends of the Furka Pass road and the Gärstenhörner. At that time, the level crossing was located in the rack-and-pinion section and was very bumpy for cars, making it possible to drive over it only slowly. Following the closure of the mountain line, the track in the road section was removed. A solution had to be found once again for the Furka Mountain Line steam railway. The compromise was that the level crossing for rail and road had to be constructed on level ground and without a rack-and-pinion track. This meant adding two additional rack-and-pinion entry and exit sections, and the route had to be relocated higher up and made slightly steeper in order to create the short, flat section. FO HGe 4/4 31 + FO A 4064 + FO B 4255 + RhB B 2213 + FO B 4258 + FO B 4225 climbing along the original route. Below Muttbach Belvedere, 15 August 1981, photo: © Edi Meier, Bülach
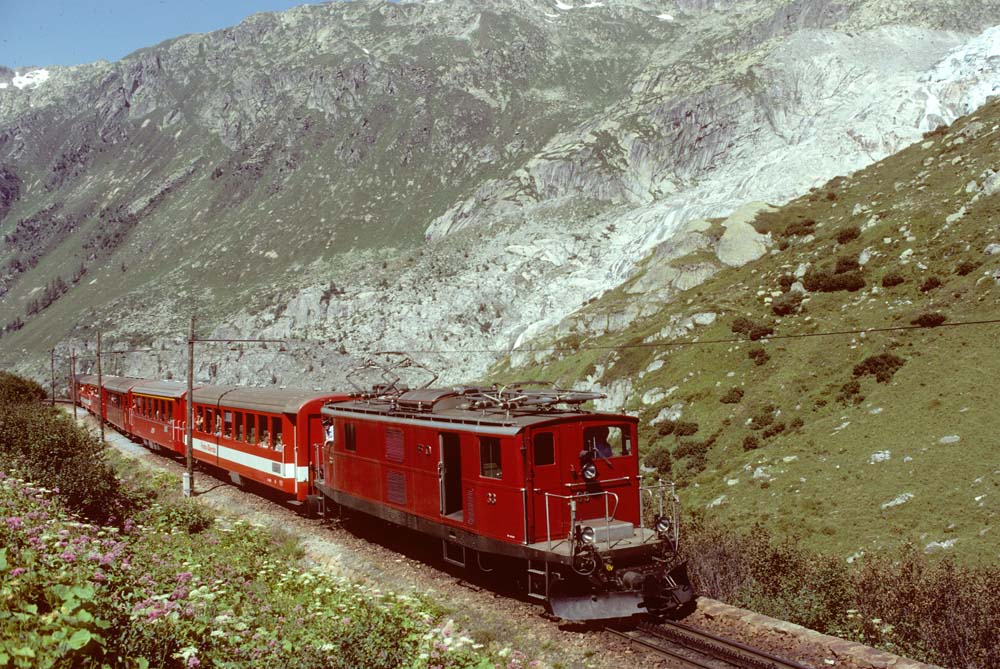 Between the level crossing and Gletsch, there is really only one good vantage point for taking photographs. And even then, only very early in the year, when the alders are still lying on the ground under the weight of winter snow and have not yet straightened up again. The rest of the route is lined on the mountain side with alders that extend almost right up to the track. On 15 August 1981, the Glacier Express consisted of FO HGe 4/4 32 + FO B 4265 + RhB A 1254 + BVZ B 2285 + RhB A 1256 + FO B 4266 + the aging platform carriage FO AB 4124. Above the train, you can still see some ice from the Rhône Glacier. Today, there is no ice to be seen there; only bare rock remains. Above Gletsch, 15 August 1981
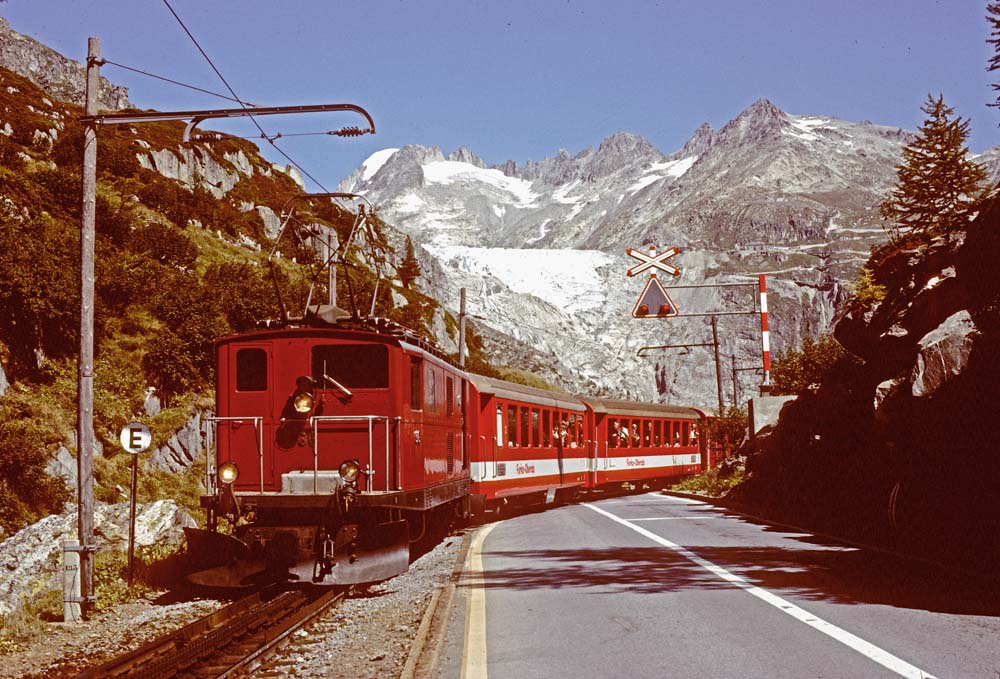 I’ll skip the much-photographed Gletsch station and show you the level crossing immediately after it instead. As soon as the train was approaching, people would stand in the road to block the cars and hold up the traffic. As soon as the driver at the front realised what was happening, we had to move into position and press the shutter at just the right moment to capture the Glacier Express with the FO HGe 4/4 36 + FO B 4266 + FO B 4267 + RhB A 1253 + BVZ B 2286 + RhB A 1255. Still visible above the train at the time: the Rhone Glacier. To the left of the locomotive is the ‘E’ sign marking the entrance to the rack-and-pinion section. Gletsch, 6 September 1981, Photo: © Edi Meier, Bülach
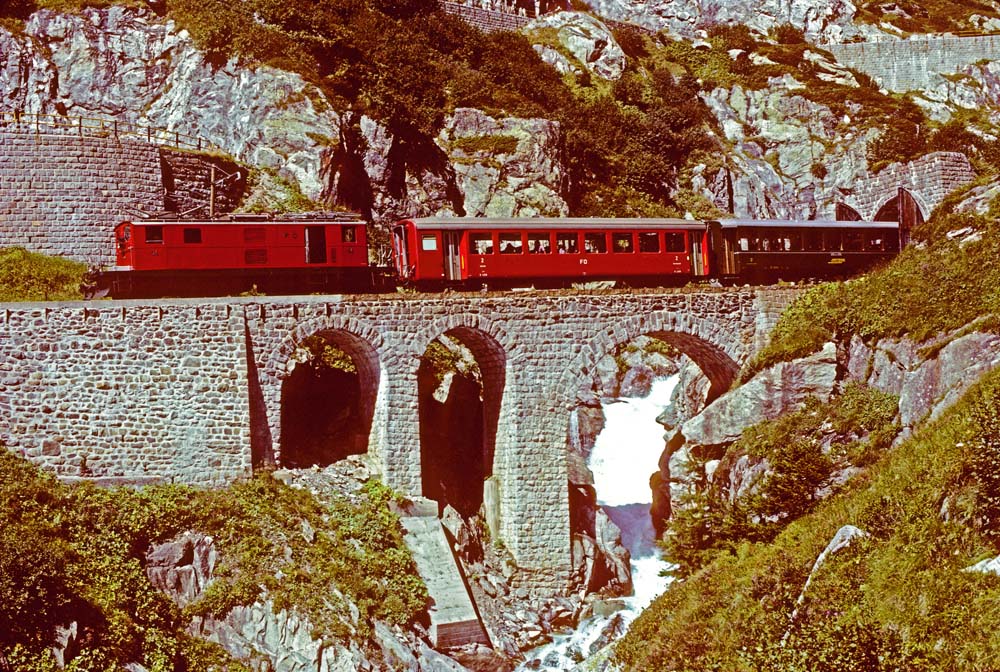 After a makeshift suspension bridge (the old one had been destroyed by avalanches during the train’s final years of operation), there is a rack-and-pinion spiral tunnel leading onto a stone bridge. FO HGe 4/4 34 + FO B 4258 + RhB B 2213 + FO B 4268 + FO A 4064 have passed through the spiral tunnel and are crossing the young Rotten, as the Rhône is known in the Upper Valais. Below Gletsch, 6 September 1981, Photo: © Edi Meier, Bülach
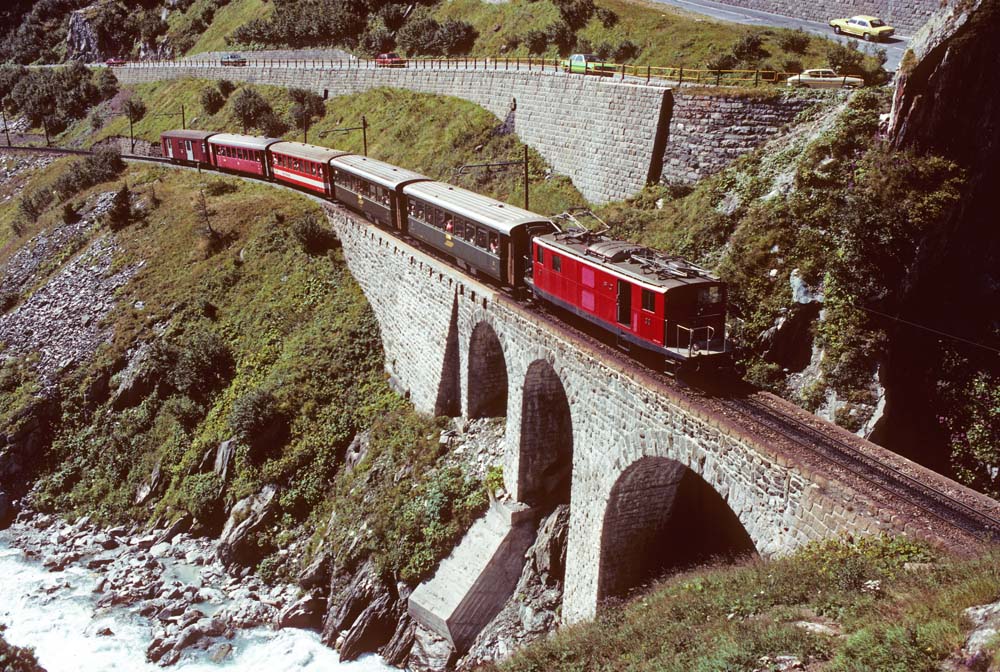 The same bridge also offers a fine vantage point for photographing trains travelling uphill. FO HGe 4/4 32 + RhB B 2212 + RhB B 2216 + FO B 4263 + FO B 4253 + FO DZ 4342 will reach Gletsch shortly. Below Gletsch, 6 September 1981, Photo: © Edi Meier, Bülach
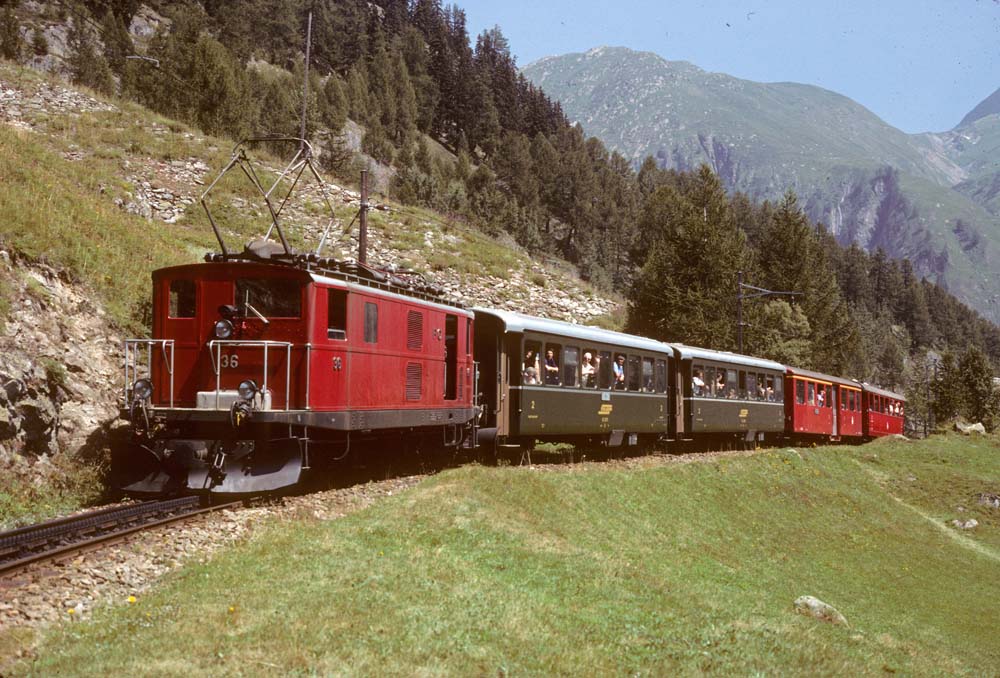 The following section up to the bridge over the road hugs the steep slope. On one side there is usually a rock face, and on the valley side, a steep wooded slope. That is why, in our final photograph of this story, taken just before Oberwald, we once again encounter what is presumed to be a double-header of the Glacier Express, consisting of the FO HGe 4/4 36 + RhB B 2211 + RhB B 2216 + BVZ A 2062 + BVZ B 2285. Above Oberwald, 6 September 1981, Photo: © Edi Meier, Bülach
Back to railway stories.